

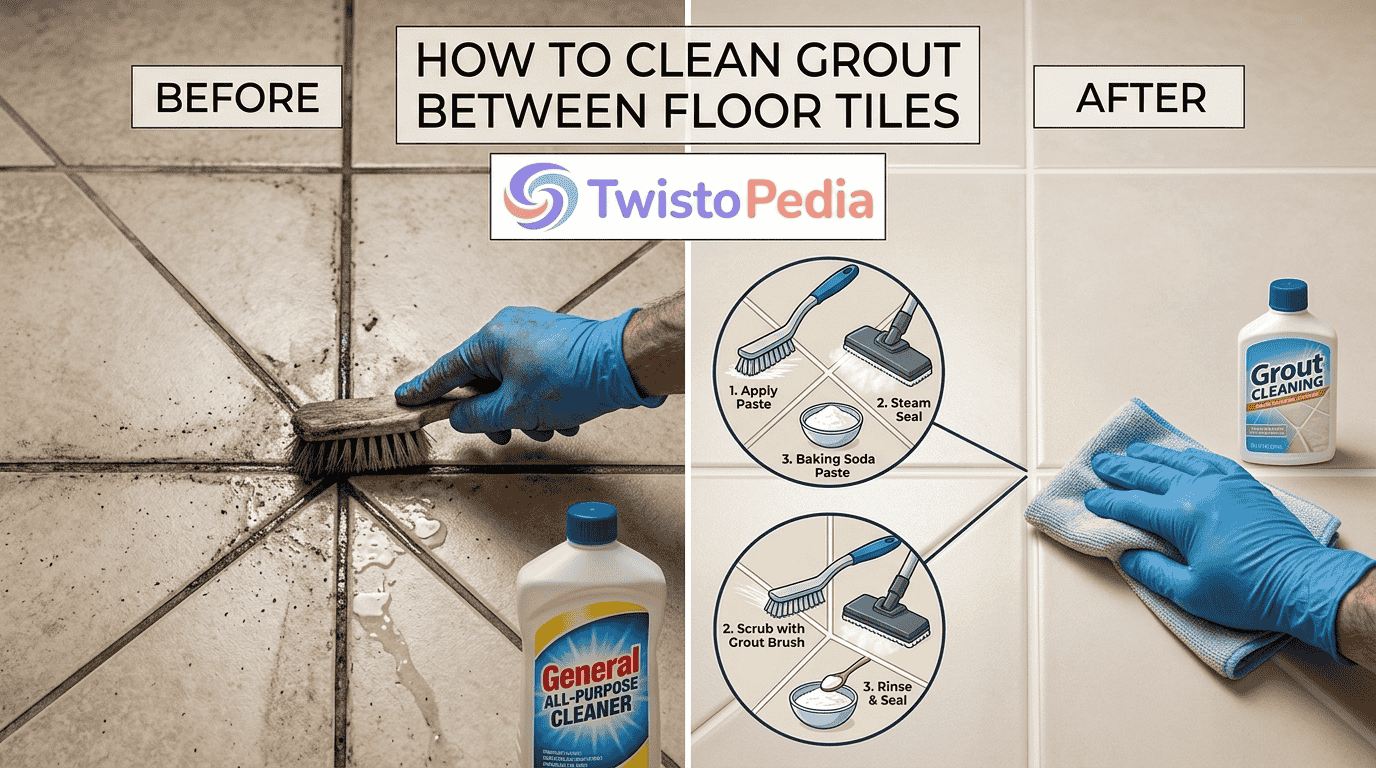
Many bathrooms and kitchens develop discolored grout even when ordinary mopping looks adequate, because everyday dirt settles below tiled surfaces. I treat grout lines separately, since surface shine can hide deeper grime over time indoors.
- How To Clean Grout Between Floor Tiles
- Why Grout Gets Dirty
- Materials And Tools Needed
- Prepare The Floor Before Cleaning Grout
- Choose The Right Grout Cleaner
- Clean Grout With Baking Soda Paste
- Scrub The Grout Lines
- Deep Clean Stubborn Grout
- How To Steam Clean Floor Grout
- Rinse And Dry The Floor
- Seal Or Reseal Grout After Cleaning
- How Often To Clean Grout
- When Cleaning Is Not Enough
A reliable grout cleaning routine starts with routine sweeping, then moves toward periodic deep cleaning only where needed. That order protects the floor, limits unnecessary cleaning products, and makes stubborn embedded dirt easier to identify.
In my experience, dull grout usually changes gradually; a hazy-looking tile can make the problem seem worse. Before scrubbing, inspect stains, choose suitable cleaning tools, and match cleaning techniques to the actual buildup currently present.
This practical step-by-step process focuses on floor-tile grout throughout the home, especially areas where dirty grout keeps returning. The aim is controlled cleaning, not aggressive scrubbing that shifts dirt around or damages the grout prematurely.
How To Clean Grout Between Floor Tiles
I start with the result: brighter grout lines usually come from controlled cleaning, not force. On floor tiles, I first remove loose dirt, debris, and surface grit through vacuuming or careful sweeping before moisture enters.
For targeted work, I apply baking soda paste or a suitable grout cleaner to grout, then wait a short time. Using stiff nylon or a soft-bristled brush, I scrub gently across the affected area slowly.
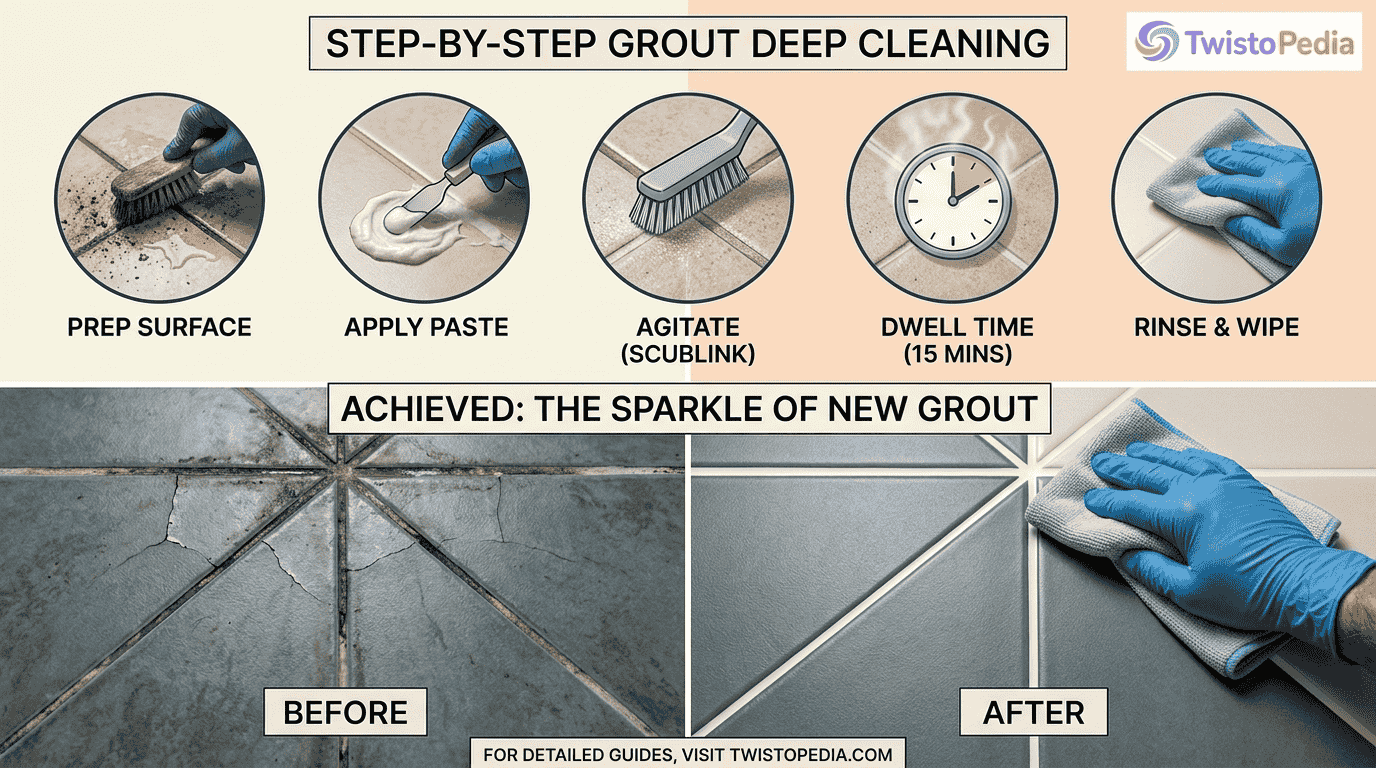
With heavily stained grout, I judge progress after each pass instead of chasing instant whitening. Deep cleaning or steam cleaning can loosen buildup, but clean water, a thorough rinse, and prompt dry steps matter equally.
My final check focuses on what remains on the floor. I clear cleaning residue with a damp brush, watch for recurring staining, and consider sealing grout after drying, helping reduce future staining without overworking joints.
Why Grout Gets Dirty
Clean-looking tile can surround surprisingly heavily soiled grout because the porous structure behaves differently from the surface. Liquids, spills, and fine dirt enter tiny openings, where gradual absorption encourages visible discoloration later during daily use.
Kitchen traffic adds grease, while bathroom moisture can support mildew or mold. Even normal floor mopping may push diluted cleaning residue toward grout lines, leaving material behind instead of fully removing accumulated grime over time.
Not every dark mark has the same cause. Stains may come from staining substances, tracked soil, or embedded dirt. I check whether the area is sealed grout before deciding how aggressively it should be treated.
A grout sealer reduces penetration but does not make joints maintenance-free, which is important when deciding how to clean grout between floor tiles. Once protection wears unevenly, porous grout can collect moisture and soil quickly, especially around repeated spills that are wiped from tile but not joints.
Materials And Tools Needed
My cleaning equipment starts with gloves, measuring containers, a mop, and several microfiber cloths. For joint work, I prefer a stiff nylon brush, scrub brush, or narrow soft-bristled brush, because control matters more than force.
For milder work, baking soda and water are common options. Hydrogen peroxide and an oxygen-based cleaner are separate products requiring label directions; a baking-soda-based paste can stay positioned on narrow joints during carefully controlled cleaning.
A steam cleaner or wet-dry vacuum becomes useful during deep cleaning, especially when loosened soil must be removed rather than redistributed. I avoid a metal brush because metal bristles can easily cause visible grout damage.
Never mix cleaning products. Use any cleaner with protective precautions and good ventilation. Chlorine bleach requires label-based handling, especially around mold-related grout staining. Afterward, assess whether a compatible grout sealer is appropriate for the surface.
Prepare The Floor Before Cleaning Grout
Good floor preparation begins before any chemical touches the joints. I remove loose debris through routine sweeping or routine vacuuming, because leftover grit turns into muddy residue once the actual grout cleaning stage begins properly.
On large tiled floors, vacuuming reaches edges efficiently, while careful sweeping works well in open areas. The objective is a debris-free surface so the chosen cleaner reaches the grout instead of coating loose dirt directly.
For finer dust, an electrostatic cleaning cloth or dry microfiber cloth can catch particles that ordinary passes miss. I sometimes use a dry microfiber mop, especially when mopping has recently left lint or residue behind.
Pay extra attention to heavily soiled grout near entrances and cooking zones. Removing surface contamination first does not replace cleaning; it simply prevents wet scrubbing from carrying grit back across joints you have already treated.
Choose The Right Grout Cleaner
Start cleaner selection by reading the grout condition, not by reaching immediately for stronger products. A mild cleaner or neutral cleaners often handle ordinary soil, while a cautious spot test reveals compatibility before wider use.
For a DIY approach, baking soda mixed into a baking-soda-and-water paste can target a small section. Hydrogen peroxide or an oxygen-based cleaner may support whitening, but results depend on the source of stains over time.
Be careful with acidic cleaners, acidic grout cleaning, and highly alkaline products. Even alkaline cleaners can be too aggressive when misused. I prefer measured escalation, enough water, and products labeled as a suitable grout cleaner.
When stained grout resists careful treatment, reassess before repeating chemistry. Existing grout sealer can affect performance, and some surfaces warrant professional cleaning rather than stronger experiments that may alter color, texture, or surrounding finishes permanently.
Clean Grout With Baking Soda Paste
For targeted cleaner application, spread a baking-soda paste along the grout lines rather than flooding the tile. A thicker baking-soda-based paste gives the baking soda useful contact time and keeps moisture concentrated on stained grout.
Allow a reasonable dwell time before scrubbing. I use a stiff nylon brush for open joints and a narrow soft-bristled brush or old toothbrush near edges, applying steady agitation without grinding the surface unnecessarily hard.
After brushing, carefully inspect the released soil. A dirty cleaning solution should not remain sitting on the grout; lift it away, then rinse with clean water so loosened material does not settle back into pores.
Persistent stains may require repeat cleaning, but more force is not automatically better. Reapply an appropriate cleaner only where needed, preserve controlled working time, and prioritize thorough residue removal before judging the final color again.
Scrub The Grout Lines
Work one grout joint at a time so pressure stays controlled. For individual grout lines, a stiff nylon grout brush provides manual agitation, while a narrow soft-bristled brush reaches corners without scraping adjacent tile edges.
An old toothbrush can handle detailed areas, but a purpose-built scrub brush usually covers longer grout lines more efficiently. Keep scrubbing directional so loosened soil moves outward instead of being repeatedly pushed along the joint.
I avoid a metal brush for routine work. Hard metal bristles can create grout damage, especially where joints are already weakened. The goal is controlled cleaning with the chosen cleaner, not visible surface erosion afterward.
For larger deep cleaning jobs, powered scrubbing attachments may reduce repetitive hand effort, but speed should stay moderate. Pause, inspect the joint, and adjust pressure whenever the surface begins shedding particles or developing uneven texture.
Deep Clean Stubborn Grout
When ordinary grime survives routine treatment, I move into deep cleaning rather than immediately using an aggressive cleaning technique. The first goal is loosening embedded soil with water, patience, and a suitable dedicated grout cleaner.
A gentle baking-soda cleaning process may still help, especially when baking soda is given enough working time. For greasy residue, a little mild soap can assist, but excess suds create more unnecessary rinsing work afterward.
If repeated passes produce dirty water, remove it promptly. A wet-dry vacuum is useful for extracting loosened dirty water from broad areas, preventing dissolved contamination from drying back into joints and complicating repeated cleaning later.
For stubborn grout, steam or other stronger cleaning approaches may be considered only after checking condition. Stains and mold-related staining can reflect deeper issues, so increasing force blindly may improve appearance briefly without solving cause.
How To Steam Clean Floor Grout
Use steam cleaning selectively because steam exposure affects different joints differently. On sound floor grout, controlled steam can soften grime and embedded soil, but prolonged heat is unnecessary when lighter conventional cleaning already works effectively.
Begin by removing loose dirt, then treat small grout sections rather than the entire floor at once. As loosened grime appears, wipe with microfiber cloths so moisture and soil do not remain sitting on joints.
Extra caution is sensible with older grout, porous grout, or poorly sealed grout. Existing deterioration can gradually worsen if heat, moisture, and scrubbing are combined aggressively, particularly where the surface already appears visibly weakened overall.
Check overall grout condition before starting. Damaged grout should not be challenged simply because steam is available. Where suitable, pair short passes with light scrubbing, then stop once deep cleaning has released the embedded contamination.
Rinse And Dry The Floor
Once scrubbing is complete, remove loosened material before it dries. I use clean water for rinsing, changing it whenever it turns cloudy, because reused water can spread cleaning residue across nearby tiled surfaces during cleanup.
A second pass helps remove soap residue and cleaner residue left after washing. Keep the floor only as wet as necessary; excessive water can carry dissolved soil back toward the grout while you continue working.
For larger areas, fresh mopping materials make a noticeable difference. A clean microfiber pad lifts loosened grime more effectively than a saturated one, and it reduces the chance of redistributing residue between previously cleaned sections.
Finish with deliberate drying rather than leaving pooled moisture behind. Good airflow and absorbent cloths help reveal the true result, because damp joints often appear darker and can disguise residue that still needs another rinse.
Seal Or Reseal Grout After Cleaning
After freshly cleaned grout becomes fully dry, decide whether sealing is appropriate. A compatible grout sealer can reduce future staining, but applying it over damp joints traps moisture and undermines otherwise careful long-term grout maintenance.
Respect the product’s curing time and confirm genuinely dry grout before application. For newly installed grout, follow the required adequate curing time first; rushing sealing grout can interfere with normal curing and produce uneven protection.
Household usage patterns matter. High-traffic locations may need inspection and resealing sooner than low-traffic locations, especially after repeated washing. I judge protection by water behavior, wear, and staining rather than relying only on calendar dates.
Proper sealing preserves renewed grout, but it cannot repair failed joints. If cracking, crumbling, or separation is present, grout replacement may be more sensible than adding another protective coat over material that is already compromised.
How Often To Clean Grout
Good ongoing maintenance is mostly preventive. Regular dry cleaning removes grit before it lodges in joints, while routine cleaning addresses light soil. Save periodic cleaning with stronger methods for areas showing actual buildup over time.
Handle spills quickly and use spot cleaning instead of washing the whole room unnecessarily. In humid rooms, steady ventilation matters because moisture lingers around joints, making dingy grout and recurring surface growth more likely indoors.
There is no universal schedule for frequent grout cleaning. Areas exposed to heavy grime or repeated wet floor cleaning deserve closer inspection, while quieter spaces can often stay presentable with dry care and timely treatment.
Use suitable cleaners consistently and evaluate protection during routine care. Resealing may become relevant when water begins absorbing quickly or staining returns easily, but frequency should follow grout type, sealer guidance, traffic, and observed wear.
What Is Grout?
Grout is the material filling joints between installed tiles, helping support spacing and limit debris entry. Traditional cementitious grout typically combines cement, water, and graded aggregate materials, with formulation adjusted for joint width and performance.
Many forms of residential cementitious grout include sand or another filler to control shrinkage and strength. Understanding grout composition matters because cleaning chemistry that suits one formulation may be unnecessarily harsh for another during maintenance.
Different grout types react differently to moisture and chemicals. Epoxy grout, for example, relies on resin chemistry rather than ordinary cement hydration, so its absorption, stain resistance, and maintenance behavior differ from cement-based joints substantially.
Knowing what fills your joints changes how you clean them. I check installation age, hardness, porosity, and previous sealing before selecting a method, because appearance alone rarely identifies the material or its current condition reliably.
Does Grout Need To Be Maintained?
Yes, especially with cement-based grout. Consistent grout maintenance reduces gradual staining and makes later routine cleaning easier. The most useful habits are dry soil removal, careful product choice, and avoiding unnecessarily prolonged indoor surface wetness.
Treat spills as local events rather than waiting for the next full-floor wash. Prompt spill cleanup limits absorption, while suitable cleaners remove residue without forcing you to compensate later with excessive scrubbing or stronger chemistry.
Moisture management matters as much as cleaning. Excess humidity keeps joints damp longer, so practical humidity control through airflow and ventilation can reduce conditions that encourage recurring discoloration or biological surface growth in vulnerable rooms.
Maintenance also includes checking protective treatments. Periodic resealing may be appropriate for compatible porous joints when existing protection weakens, but the interval should follow sealer instructions, joint condition, traffic patterns, and actual water absorption behavior.
When Should You Call A Professional?
Consider professional help when excessive staining remains after careful cleaning, especially if the color change returns quickly. Persistent discoloration can indicate that the visible grout problem is only the surface expression of something meaningfully deeper.
Pay attention to persistent odors, recurring dampness, or stains that reappear without an obvious spill. Those signs can suggest a moisture-related problem, and repeated cosmetic cleaning may delay identifying the source that actually needs attention.
A deeper moisture problem deserves investigation when joints stay damp, soften, crumble, or darken repeatedly. A qualified professional can assess whether surrounding tile, substrate conditions, plumbing, ventilation, or failed waterproofing is contributing to the pattern.
Some permanent discoloration is simply cosmetic, but diagnosis matters before accepting that conclusion. Professional assessment becomes especially useful when cleaning results are inconsistent, structural deterioration appears, or the same area repeatedly worsens despite reasonable maintenance.
When Cleaning Is Not Enough
When failed cleaning leaves joints unchanged, stop escalating blindly. Continued chemical exposure or harder brushing can damage the surface without improving color, particularly when discoloration has penetrated deeply or the joint has deteriorated over time.
Before trying to restore grout again, inspect hardness, cracking, missing material, and recurring moisture. If the joint is sound, another carefully selected process may help; if it is failing, appearance is no longer the priority.
Professional deep cleaning can sometimes recover heavily embedded soil that household methods leave behind. However, success depends on whether the problem is contamination, permanent staining, sealer failure, mineral deposits, or breakdown of the joint material.
Where the joint has lost integrity, grout replacement may provide a more durable result than repeated cleaning. Replacement creates an opportunity to correct failed sections, choose compatible materials, and restart sealing and maintenance properly afterward.